
 100% Security Verified | No Subscription Required | No Malware

Want to save time when adding subtitles to your videos? With Clipchamp auto captions, you can generate subtitles automatically using speech recognition. This feature can make your videos more accessible and engaging, even when viewers watch without sound.
Besides automatic captions, Clipchamp subtitles can also be manually edited. This way, you can adjust the text, timing, and style to fit your content's needs. This feature gives you more control over how your message is presented to your audience.
In this guide, we'll walk you through how to use both options, from auto-generating captions to manually adding subtitles. We'll also introduce an AI-powered alternative to Clipchamp captions if you want more flexibility and control. Let's get started!

In this article
Part 1. How to Automatically Add Captions on Clipchamp Videos
The Clipchamp auto captions tool lets you generate subtitles automatically using speech-to-text technology. This feature is perfect for quickly adding captions to your videos, helping make your content more accessible without manual transcription.
Follow this step-by-step guide to add captions on Clipchamp with its auto captions feature:
Go to Clipchamp's website and click Sign in if you already have an account. Or, select Try for Free to create a new one.
Step 1. Sign In to Clipchamp and Start the Project
Go to Clipchamp's website and click Sign in if you already have an account. Or, select Try for Free to create a new one.

Once you're logged in, navigate to Home > Create a New Video to get started.

Step 2. Upload and Add Your Video to the Timeline
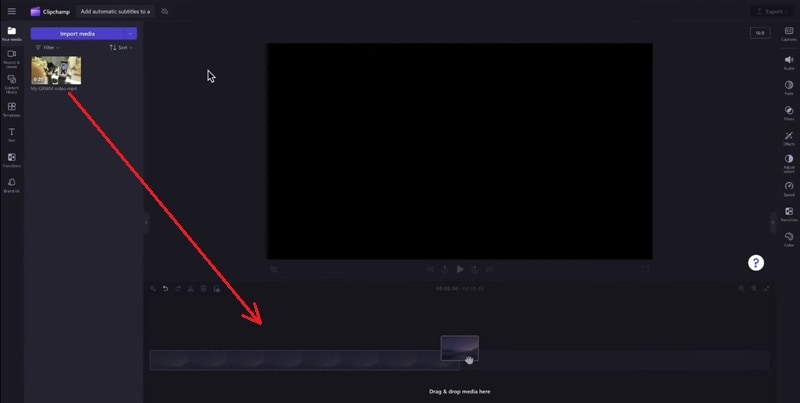
In the toolbar, go to the Your Media tab and click Import Media to upload your video from your device. Or, use the dropdown button to upload from cloud storage services.

Once uploaded, drag your video onto the timeline to start editing.
Step 3. Turn on Clipchamp Auto Captions
Select your video on the timeline. Then go to the right side of the screen, click the Captions tab, and press the Turn on Auto Captions button.

A pop-up window will appear. Choose your video’s language and optionally enable the profanity filter. Click Transcribe Media to start generating captions.

Step 4. Wait for Captions to Generate
Depending on your video length and internet speed, the captions may take a few moments. Once ready, you’ll see them in the Captions tab and directly in the video preview screen.

Part 2. How to Manually Customize Subtitles on Clipchamp
Once you add subtitles on Clipchamp with its auto captions tool, it's time to customize them. You can edit the text if there are any misspellings or grammatical errors, and change the style to fit your video's needs.
Follow the step-by-step below to customize the subtitles further:
Step 1. Edit the Clipchamp Captions Text
- Use the Play button to preview your video with captions.
- Go to the Captions tab on the right. Click on any word or sentence to correct spelling, fix typos, or rewrite phrases.
Step 2. Adjust Caption Timing
If subtitles appear too early or late, you can manually adjust their timing to match the spoken audio better.

Step 3. Customize Caption Style
Go to the Text tab to change the appearance of the captions. Here, you can:
- Change the font and size.
- Adjust text color and background color.
- Modify alignment and position.
- Add effects like outlines, shadows, or fades.

Step 4. Preview Your Captions
Hit Play to watch the video and check how your customized subtitles look. Make any final edits as needed.
Step 5. Export Your Video with Subtitles
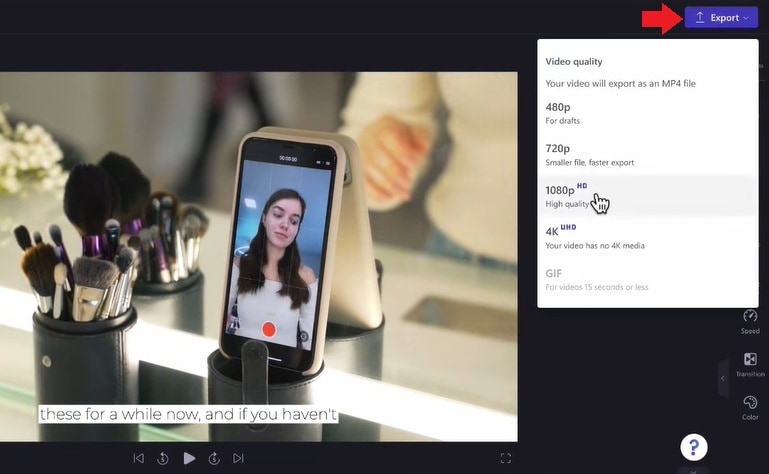
Once you're happy with your Clipchamp subtitles, click Export and choose your preferred video resolution to save your video with subtitles.
Wait for the loading process, then click Save to Your Computer to download the video with captions included.

Limitations of Clipchamp Auto Captions
Clipchamp auto captions are a convenient tool for generating subtitles. However, there are several limitations to be aware of:
- Single Language Support: Currently, Clipchamp supports only one language per video for auto-captioning. If your content includes multiple languages, you'll need to create separate projects for each language segment.
- Partial Transcription Issues: Some users have reported that auto-captioning may stop partway through longer videos, sometimes transcribing only a portion of the content. This issue has been noted across both free and premium accounts.
- Browser Compatibility: The auto-captioning feature functions optimally on Microsoft Edge. Users have experienced difficulties when using other browsers like Chrome or Safari, which may affect the transcription process.
Part 3. Want More Flexibility? Try Filmora's AI Subtitle Tools
If you've tried Clipchamp auto subtitles but need more flexibility, Wondershare Filmora can be a great alternative. It lets you auto-generate, translate, and stylize subtitles all in one place using AI-powered features. Plus, these features are available on both its desktop and mobile versions.
Here's what you can expect from Filmora's AI Subtitles tools:
- AI-powered features: It uses speech recognition to transcribe your video and auto generate captions. It can also add emojis, highlight keywords, and have a camera tracking feature for a more dynamic look.
- Translate subtitles into multiple languages: Easily translate captions into different languages within the same project, without needing to create separate versions for each language.
- Apply dynamic subtitle templates: It lets you choose from pre-designed subtitle templates to match your video's style. This feature can help save you time on formatting while keeping captions visually appealing.
- Smart captioning on mobile devices: Filmora Mobile App lets you generate, edit, and customize captions directly from your phone. It's perfect for creators to edit on the go.
How to Add Subtitles with Filmora for Desktop
Follow these steps to create subtitles using Filmora's Speech-to-Text (STT) feature:
Step 1. Start by Creating a Project and Importing Video
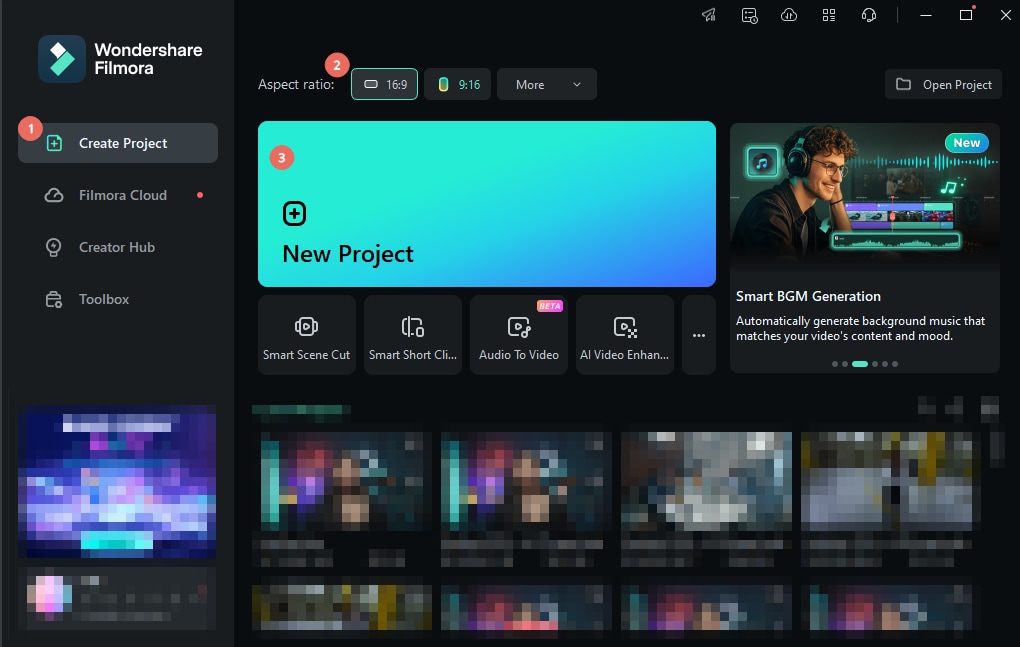
Start by launching Wondershare Filmora on your computer. Head to the Create Project tab, choose the Aspect Ratio, and click New Project to begin.


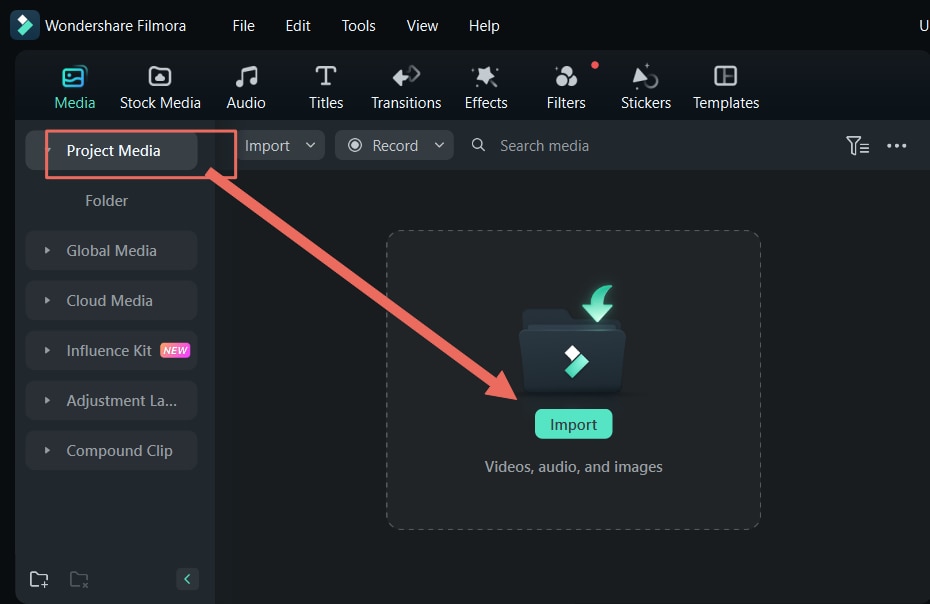
Once you're in the editing workspace, go to Media > Project Media > Import. Then, select the video file from your device and drag it to the timeline.
Step 2. Open the Speech to Text Feature
- Click on your video clip in the timeline to select it.
- Then, go to the top menu and choose Tools > Audio > Speech to Text.

Step 3. Set Up the Speech to Text Options
In the Speech to Text window, set the following options:
- Choose the spoken language in the video.
- Select the target language (optional, set to “No Translation” if you don't want to translate the subtitles)
- Turn on the Add Automatical Active Words tool to generate dynamic animation for the subtitles.
- Turn on the Auto Match tool to automatically sync subtitles with the video timeline.
Once you've adjusted the settings, click Generate to begin creating subtitles.

Step 4. Review and Edit the Subtitles
When the transcription is finished, a subtitle track will appear on your timeline. Double-click the subtitle track to open the Edit Subtitle window.

Here, you can check the subtitles for any mistakes and make corrections. You can also customize the font, color, size, and style to match your video's look. When you're done editing, click Save to apply the changes.

How to Add Subtitles with Filmora for Mobile
If you prefer editing from your phone, Filmora Mobile offers powerful AI captioning tools on the go. You can download Filmora Mobile from the Google Play Store or the Apple App Store to create subtitles easily on your phone.
 secure download
 Here's a step-by-step guide to adding captions to your videos using its AI Caption tool:
Step 1. Launch Filmora and Import Your Video
- Open the Filmora app on your smartphone. Tap AI Caption located above the New Project button. (You can also find it under the More menu, shown as a three-dot icon.)
- Select the video clips you want to subtitle from your phone's gallery. Then, tap Import to bring them into the timeline.

Step 2. Configure the AI Caption Settings
Next, Select the Current Language for your video, or let Auto Identify detect it for you. If you'd like subtitles in two languages, turn on the Bilingual Caption option.
Under AI Packaging, you can enable extra smart features to enhance your captions:
- AI Highlight: Highlight keywords or phrases in your subtitles.
- AI Emoji: Adds emojis based on your video's content.
- AI Camera: Automatically zooms in or follows the speaker's face.
- Smart Stickers: Insert stickers that align with keywords or emotions in your captions.
Once your settings are ready, tap Add Captions to generate subtitles for your video.

Step 3. Edit and Customize Your Captions
- Pick a subtitle template that matches your video's theme.
- Tap Project Edit to enter the editing workspace. Here, you can adjust the text, timing, position, font style, and colors of your captions.
Tip: Use Batch Edit to make text changes across all captions at once for faster editing.

Step 4. Export and Share Your Video
When you're finished, tap Export at the top right of the screen.

Select your preferred video resolution and quality settings, then tap Export again to save the final video to your device.

From there, you can share your captioned video across other social platforms straight from the app.
 secure download
 Conclusion
With Clipchamp auto captions, adding subtitles to your videos is faster and more convenient. This feature makes it easy to generate captions without manual typing. It helps you to make your content more accessible, even when viewers watch without sound.
You can also manually adjust your Clipchamp subtitles to correct errors and change the style to match your video content. This way, your Clipchamp captions stay clear, accurate, and match your video's tone.
If you're looking for additional features, try Filmora's AI subtitle tools. It has multi-language support, dynamic templates, and smart captioning on both desktop and mobile. Ready to add captions to your next video? Start editing right now!

