
 100% Security Verified | No Subscription Required | No Malware

Travel has always been seen as an exciting adventure, and people throughout history have set sail for faraway lands to explore new cultures or simply to enjoy the natural wonders of the world.
Even today, people can't get enough of it, which is why travel vlogs have gotten immensely popular. It may seem like the perfect career choice – visit all kinds of interesting locations, do a bit of filming, and build a big audience.
However, the market is quite saturated, with lots of fierce competition, so you will need some proven vlog editing techniques for travel videos if you want your content to stand out.
Luckily, there is a powerful video editor that is favored by numerous vloggers – Wondershare Filmora. We'll give you 10 travel vlog editing tips and teach you how to use this awesome tool.
In this article
1. Create a Stunning Intro for Your Travel Vlog
The first step is to lure your viewers into your unique little world of adventure with a compelling intro sequence. Luckily, you won't have to spend hours looking for good B-roll footage to create something from scratch, as Filmora has plenty of ready-made templates that you can use.
 secure download

- Open Filmora and start a New Project, then go to Import Media and the video clips you want to add.

- Go to Templates > Travel, and you will find lots of great options. When you find a suitable intro, just drag it to the timeline and add it to the timeline.

- Replace the video materials in the template with your own clips.

- You also have a lot of great outro options under Subscribe, where you can add your call to action and remind viewers to leave a like and subscribe to your channel at the end of the video.


With a solid intro and outro, you're on your way to a good start, but there are a few more things you can do to really make the video shine.
2. Use Smooth Transitions Between Scenes in Your Travel Videos

One of the biggest travel vlog editing tips we can give you is to have fun transitions between your clips. It allows you to move from one scene smoothly or shot to create a more polished and engaging viewing experience.
- 100+ advanced video editing features.
- Vast video/audio effects and creative assets.
- Powerful AI for effortless content creation.
- Intuitive, professional yet beginner-friendly.
- Works on Mac, Windows, iOS, and Android.

Here's how simple this process is in Filmora:
- Go to Transitions, pick an option you like, and drag it to the line separating two different clips.
- You can stick with the same type of transition for short clips, or use a few different ones to keep longer clips fresh and exciting.

At this point, things are starting to look a bit more polished, but you'll need some background music.
3. Incorporate Background Music to Improve Engagement
Every travel experience has its own unique vibe, and that doesn't always come across in video clips. The best solution is to add some fitting music to set the right tone, and there is an AI feature that can save you a lot of time.
You can use Smart BGM Generation to create unique musical numbers based on what's going on in each clip – videos with more action will have an upbeat melody, while slower and more romantic ones will have a more serene soundtrack.
secure download Just follow these steps:
- In the main menu, go to the Toolbox, then scroll down and click on Smart BGM Generation.

- Click Start in the pop-up window and wait a minute or two for the AI to finish.

Having the right music will make a big difference, and you can even take it a step further with the next tip.
4. Sync Video Cuts with Beats to Make the Video More Exciting
As you will have plenty of cuts throughout the video, you may want to ensure that the audio follows that pattern and switches up with every cut. It's easy enough to set this up in Filmora:
- Go to Audio and choose a music file you like, then right-click on it and select Beat Detection. If you already have a music file on the timeline, click on it instead and do the same.

- If you want to customize it a little, right-click on the audio again and select Beat Options.

- In the pop-up window, you can choose between different beat models and modify when the highlights occur, then click OK to finish.

The video should look and sound more dynamic now, but you can also add some subtitles.
5. Include Text Overlays and Subtitles to Convey Your Message Clearly
A common travel video format is to have narration over shots of the local scenery, historical sites, and food, and having subtitles just makes it easier for everyone to follow along. However, transcribing the entire script can take ages, so you'll want to use a quick shortcut. Here's how to apply AI captions and make them pop up as the words are being spoken.
secure download - Go to Titles > AI Captions > Dynamic Caption, choose a language, and click Generate.

The subtitles will now match the flow of your audio, but you can also play around with the speed of the clips.
6. Use Speed Ramping to Highlight Some Moments
If you want to give your video that Hollywood feel, you can play around with speed ramping to make certain parts of the video faster and then slow down for that big, important moment, like a long shot of the mountains on the horizon or a beautiful old castle. It's a super simple process:
- Click on the video in the timeline to select it.
- Go to Video > Speed > Speed Ramping in the upper right and pick one of the options.

With these travel vlog editing techniques, you've gone from a basic video to something that looks like it came out of a professional studio. However, we're not done yet.
7. Use Motion Tracking to add Animated Text

A great little extra touch, especially for shorter social media promo videos, is to have animated text follow the subject throughout the shot. You can have it hover over you as you walk the busy streets of a local town or follow a car or bus passing by in your wide shot. Here's how to set it up
secure download
- Click on the video in the timeline, then go to Video > AI Tools and click to enable Motion Tracking.
- Go to the button labelled Click to start Motion Tracking, then position the little rectangle in the preview window on the subject you want it to track.

- Go to Titles and pick an animated text effect you like, then drag it to the timeline above the video.

- Go back to Video > AI Tools > Motion Tracking and click Link Element. In the dropdown menu, select the name of the title effect you've added.

You can now have cool animated text following your subject around the screen in select scenes. Keep scrolling to learn how to add a few other interesting effects.
8. Master Video Effects to Enhance the Quality of Your Travel Vlog

There are tons of cool effects to play around with in Filmora based on several different themes like love, nature, energy, light, and retro. They all add something a bit different to the final look of your video, and it all depends on the style you are going for. In this example, we've used a lens flare effect to make the scene look surreal.
- Click on the Effects tab and scroll through all the different options to find something you like.
- Drag an effect that matches the tone of the video to the timeline above the main clip.

9. Add Personal Narrations to Get Better Viewer Retention
With travel vlogs, good narration is just as important as having breathtaking shots. In Filmora, you can either record your own narrations with Filmora's audio recording feature or use AI to generate a voice in different languages and voice effects. In addition to that, Filmora allows you to reduce background noise and enhance the clarity of your voice with AI, which can be really helpful if there is noise in your travel videos.
Here are the steps:
- If you want to add your own narration, go to File > Record Media > Record Voiceover.

- Click on the audio file on the timeline and go to Audio > Basic, then scroll down and click to enable the AI Voice Enhancer feature.
- Use the Voice Clarity and Voice Beautification sliders to get your audio sounding just right.

- When you're done with the project, go to Export in the upper right corner of the screen. In the pop-up window, choose the location on your hard drive where you want to save the file and the resolution and format, then click Export.

10. Create Eye-Catching Thumbnails to Get More Clicks

It doesn't matter if you have the best travel video in the world if no one clicks on it. You want to grab people's attention with awesome thumbnails so that you can start getting more views and, hopefully, more subscribers.
Big YouTube channels often hire artists to design their thumbnails, but there is a much easier and cheaper way for new content creators – thumbnail templates. Filmora also has a useful feature that can help you create great video thumbnails in just a couple of minutes.
- Go to Export and click on Edit under the Thumbnail icon on the left.
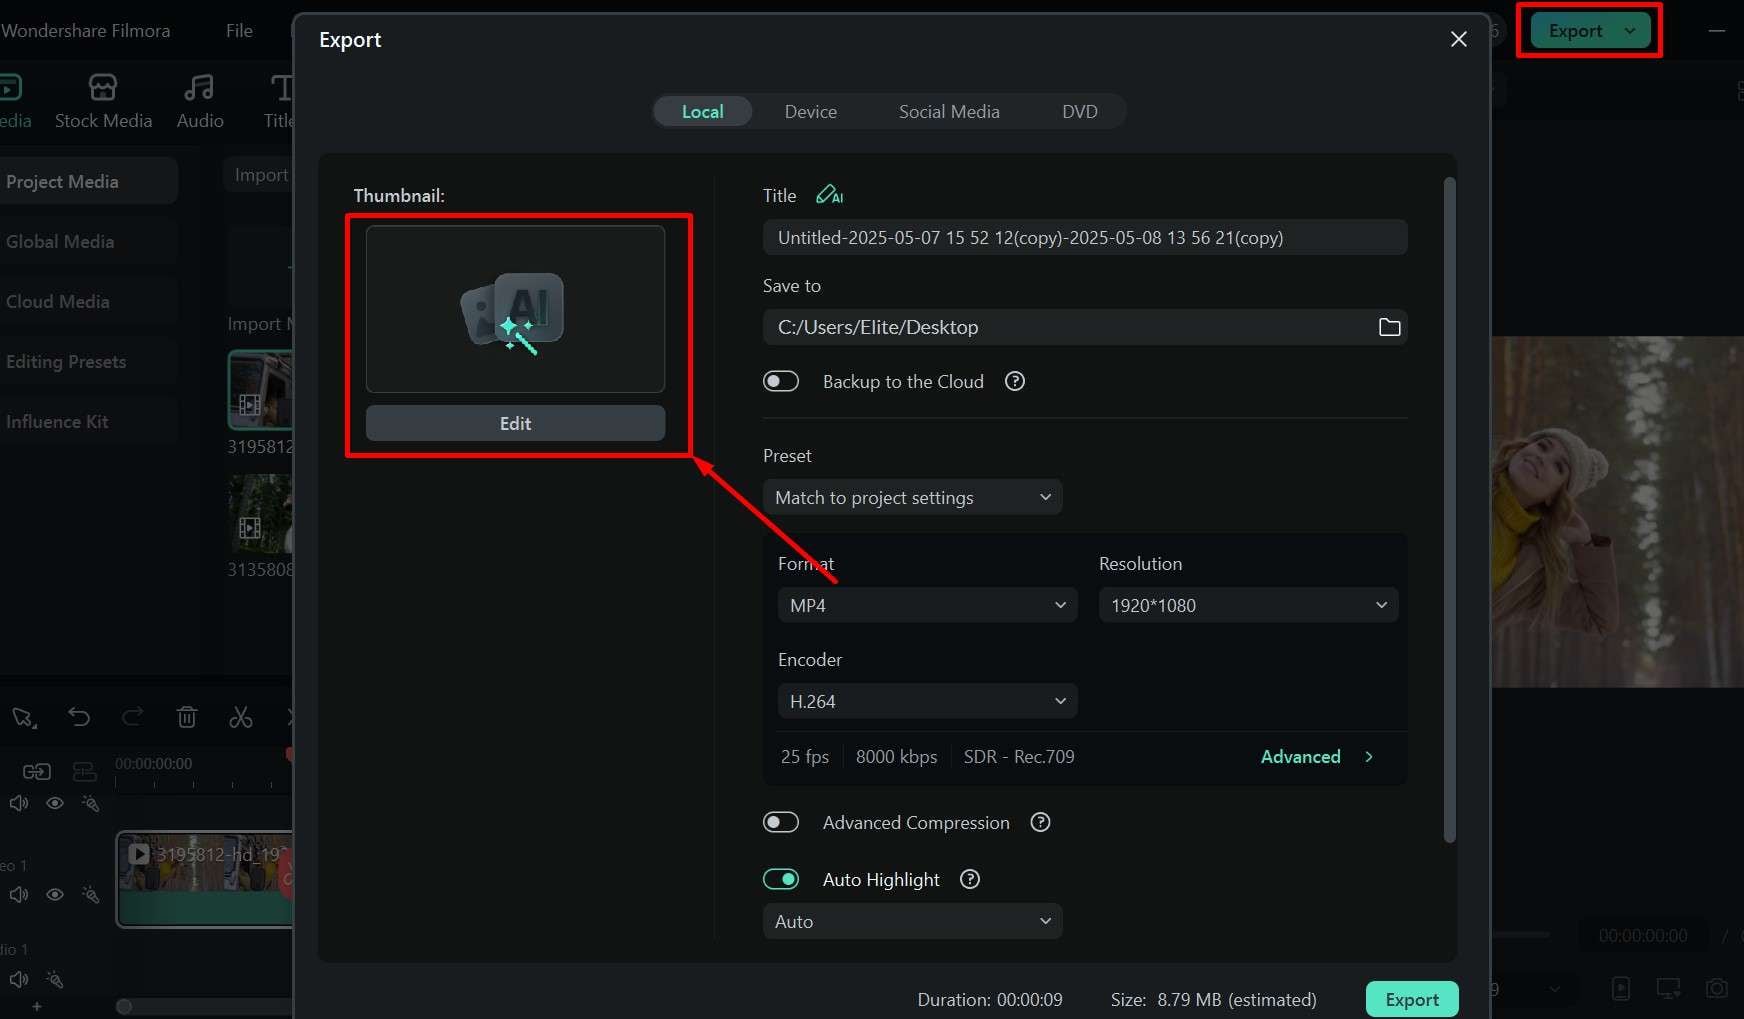
- Click on From Video to take a picture from a frame in the video, and then go to Template > Vlog to find the font and design you like.

- Click on any element to open the Customize menu where you can change the text, font, size and color of the letters, and then click Save. Do this for all the different elements.

Tips: You should have a hook, a phrase that gives a glimpse into what people can expect from the video, or something that tickles their curiosity. Combine this with the name of your vlog or the name of the video series you are doing, and keep the design consistent in all your videos, as this will be a big part of your branding.
Your video thumbnails should be recognizable at a glance, and that comes from the font, layout, and colors you choose.
Conclusion
Travel vlogging is an art form, so it takes time and some trial and error before you can develop your own unique style. As you slowly grow your audience, you will see what works and what doesn't, but you'll always have Wondershare Filmora to help you make all the necessary changes.
It really is a one-stop shop for all your video editing needs, from cutting up clips, adding transitions, and applying effects, to using AI to generate background music and thumbnail image templates. There is even a Filmora mobile app that you can use to quickly edit short videos on the go for YouTube shorts, Instagram reels, or TikTok.
We hope you liked our vlog editing tips, but feel free to experiment, as there is so much more you can do with this great video editor.
secure download 
